一、简介
思澈科技内置外置屏幕添加流程,这里以SF32LB52-LCD_N16R8为例
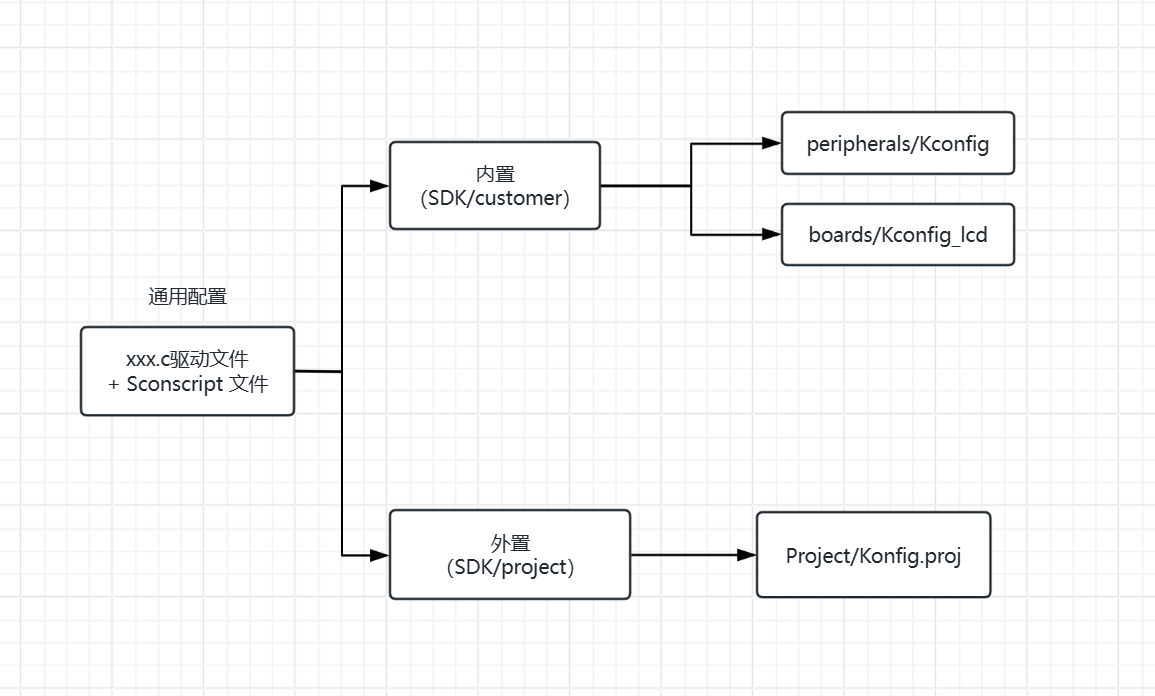
内置:所有工程下都可在menuconfig中选中加入的屏幕
外置:特定工程下加入的屏幕驱动
本文简单展示了如何添加新的屏幕驱动模组
屏幕参数:
驱动 IC: st77996
接口:DBI
分辨率:480 * 320
二、通用配置
屏幕驱动的配置属于通用流程,在内置和外置中都是一样的。
主要有接口配置、时序配置、初始化配置
参考文档
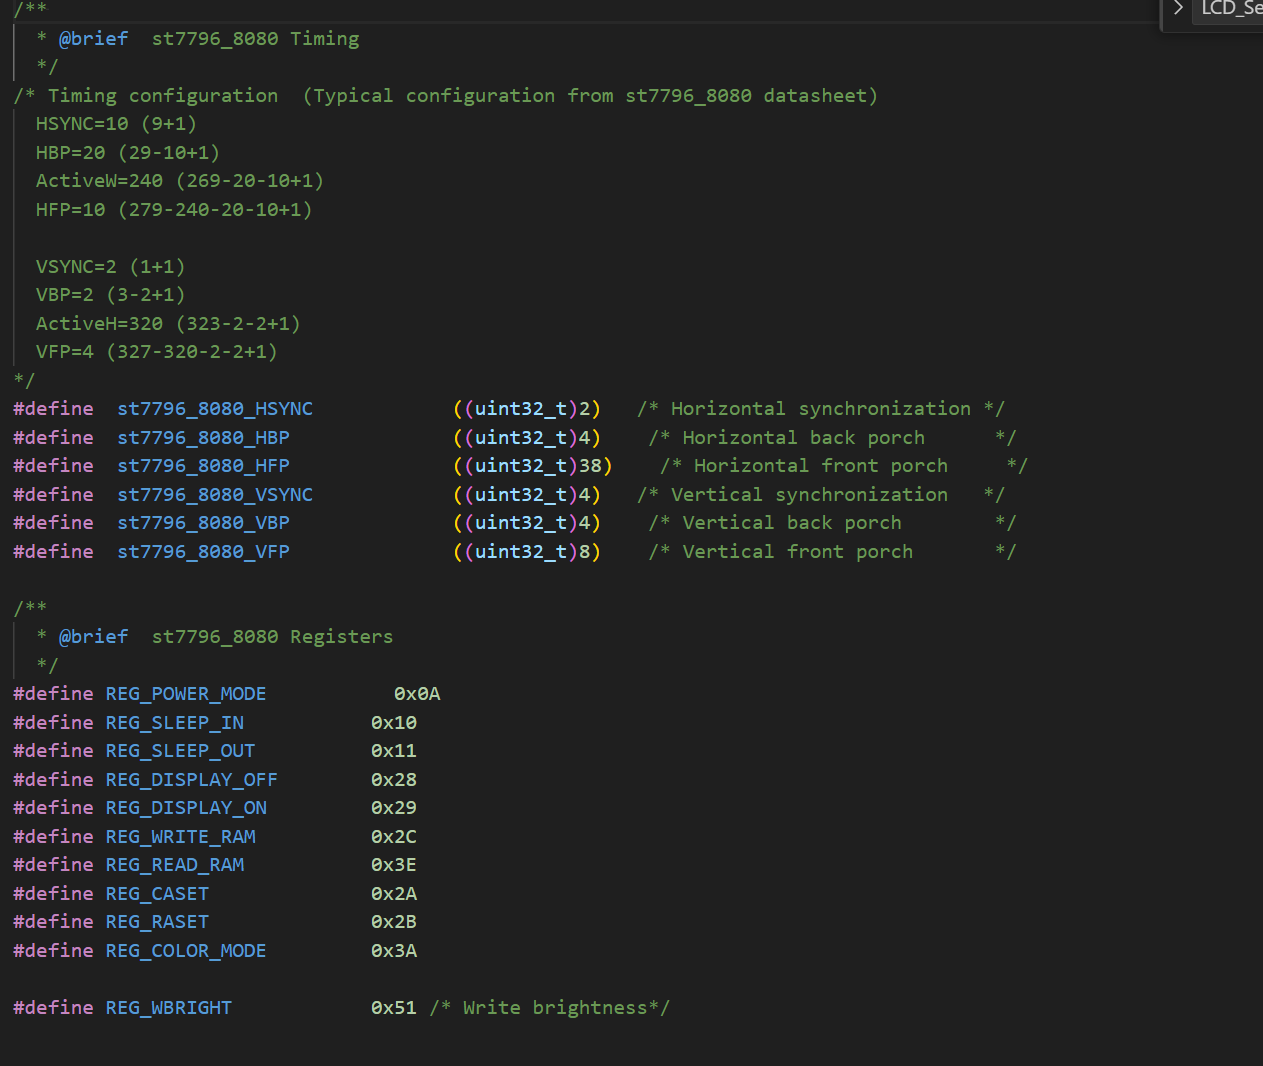
2.1 Timing & Registers
时序和寄存器宏定义,这些可以按照需求配置
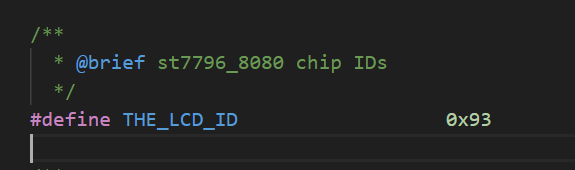
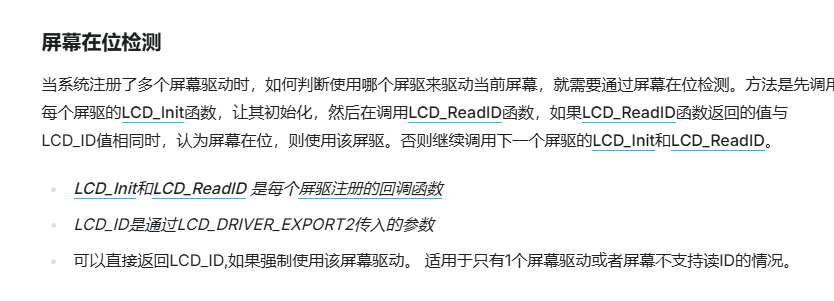
2.2 THE_LCD_ID
这个可以自定义配置,主要用于屏幕在位检测
2.3 LCDC配置
lcdc_int_cfg用于配置屏幕接口、色彩格式和时序等相关配置
static LCDC_InitTypeDef lcdc_int_cfg =
{
    .lcd_itf = LCDC_INTF_DBI_8BIT_B,//8线DBI接口模式
    .freq = 12000000,//12M
    .color_mode = LCDC_PIXEL_FORMAT_RGB565,//色彩格式RGB565

    .cfg = {
    /* 对于不同的接口,cfg配置参数可选择不同的配置,具体可参考 bf_hal_lcdc.h 文件 LCDC_InitTypeDef 结构体 */
        .dbi = {
            .syn_mode = HAL_LCDC_SYNC_DISABLE,//HAL_LCDC_SYNC_VER, //HAL_LCDC_SYNC_DISABLE,
            .vsyn_polarity = 0,
            .vsyn_delay_us = 0,
            .hsyn_num = 0,
        },
    },

};
2.4 屏幕初始化配置
LCD_Init() 在此函数中进行屏幕寄存器的初始化配置,具体配置需要参考屏幕驱动数据手册。
static void LCD_Init(LCDC_HandleTypeDef *hlcdc)
{
    uint8_t parameter[15];

    /* Initialize st7789_dbi low level bus layer ----------------------------------*/
    memcpy(&hlcdc->Init, &lcdc_int_cfg, sizeof(LCDC_InitTypeDef));
    if (!te_enabled)
    {
        hlcdc->Init.cfg.spi.syn_mode = HAL_LCDC_SYNC_DISABLE;
    }
    HAL_LCDC_Init(hlcdc);

    BSP_LCD_Reset(1);
    LCD_DRIVER_DELAY_MS(1);
    BSP_LCD_Reset(0); // Reset LCD
    HAL_Delay_us(20);
    BSP_LCD_Reset(1);
    LCD_DRIVER_DELAY_MS(50);

    // remark
    // parameter[0] = 0x20;
    // LCD_WriteReg(hlcdc, 0xE9, parameter, 1);

    /* Sleep Out Command */
    LCD_WriteReg(hlcdc, 0x11, (uint8_t *)NULL, 0);
    /* Wait for 120ms */
    LCD_DRIVER_DELAY_MS(120);

    parameter[0] = 0x40;//A0
    LCD_WriteReg(hlcdc, 0x36, parameter, 1);

    parameter[0] = 0x05;
    LCD_WriteReg(hlcdc, 0x3A, parameter, 1);

    parameter[0] = 0x0C;
    parameter[1] = 0x0C;
    parameter[2] = 0x00;
    parameter[3] = 0x33;
    parameter[4] = 0x33;
    LCD_WriteReg(hlcdc, 0xB2, parameter, 5);

    ...

    parameter[0] = 0x00;
    parameter[1] = 0x00;
    parameter[2] = 0x01;
    parameter[3] = 0x3F;
    LCD_WriteReg(hlcdc, 0x2A, parameter, 4);
#endif
    LCD_WriteReg(hlcdc, 0x20, (uint8_t *)NULL, 0);
    /* clear gram */
    HAL_LCDC_Next_Frame_TE(hlcdc, 0);
    HAL_LCDC_SetROIArea(hlcdc, 0, 0, THE_LCD_PIXEL_WIDTH - 1, THE_LCD_PIXEL_HEIGHT - 1);
    HAL_LCDC_LayerSetFormat(hlcdc, HAL_LCDC_LAYER_DEFAULT, LCDC_PIXEL_FORMAT_RGB565);
    HAL_LCDC_LayerDisable(hlcdc, HAL_LCDC_LAYER_DEFAULT);
    HAL_LCDC_SetBgColor(hlcdc, 0, 0, 0);
    HAL_LCDC_SendLayerData2Reg(hlcdc, REG_WRITE_RAM, 1);
    HAL_LCDC_LayerEnable(hlcdc, HAL_LCDC_LAYER_DEFAULT);
    LCD_WriteReg(hlcdc, 0x29, (uint8_t *)NULL, 0);
}
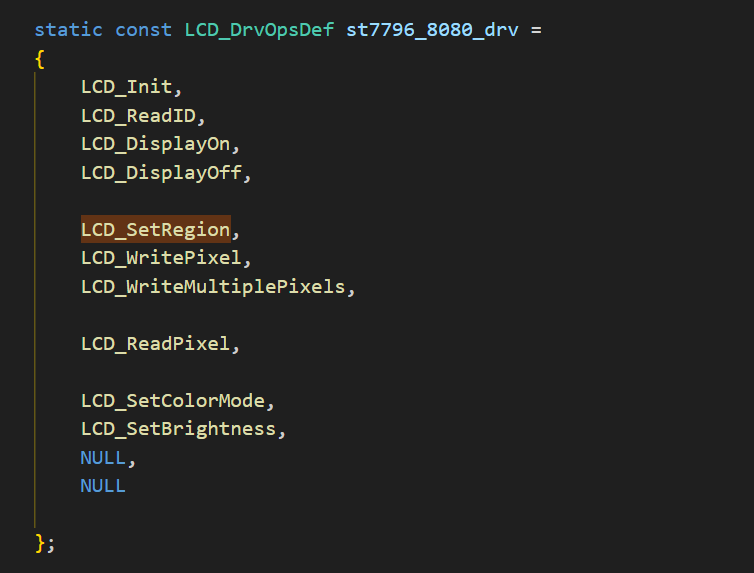
2.5 驱动回调函数
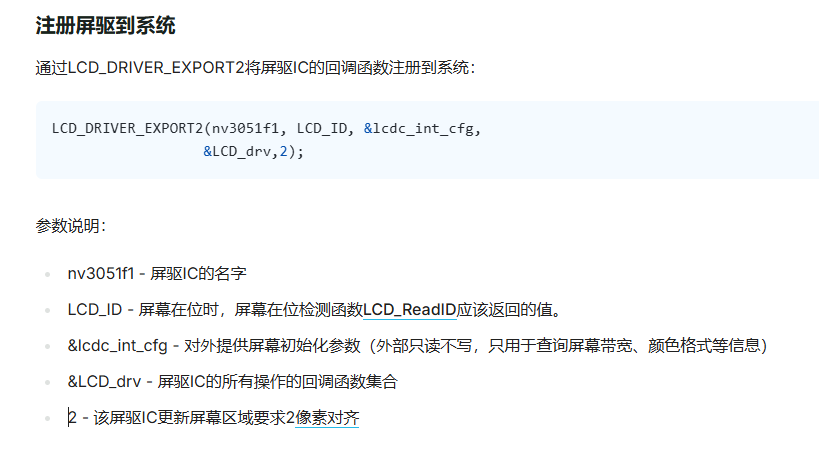
2.6 屏幕注册声明

2.7 脚本链接 SConscript
from building import *

cwd = GetCurrentDir()
src = Glob('*.c')
CPPPATH = [cwd + '/../common', cwd]
group = DefineGroup('Drivers', src, depend = ['LCD_USING_ST77989_8080'], CPPPATH = CPPPATH)
/*--------------------------------------修改成自定义的屏幕名称,避免和其他屏幕冲突 */
Return('group')
三、外置流程
3.1 工程选择
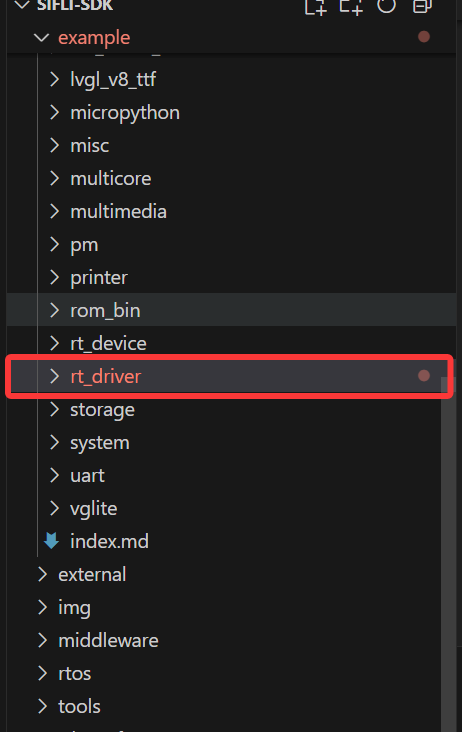
首先需要找到一个合适的基础工程,这里选择文档中推荐的
rt_driver工程
3.2 peripherals 创建
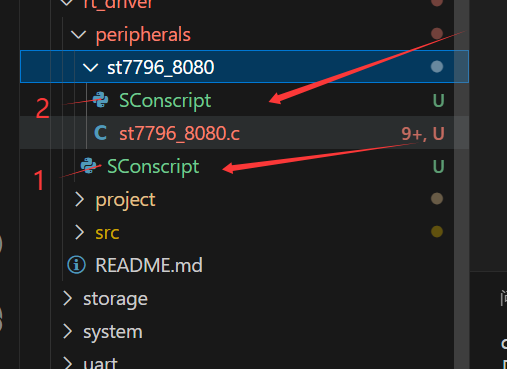
在
rt_driver下创建一个peripherals用来放置用户设备,这里也可以直接参考SDK/customer/peripehrals
并在此目录下创建屏幕的驱动芯片代码,以及必要的链接脚本文件,如下:
3.3 链接脚本 SConscript 1
无需修改,将代码加入工程脚本
# for module compiling
import os
from building import *

cwd  = GetCurrentDir()
objs = []
list = os.listdir(cwd)
if GetDepend(['BSP_USING_RTTHREAD']):
    if not GetDepend(['BSP_USING_PC_SIMULATOR']):
        if not GetDepend(['BSP_USING_BUILTIN_LCD']):
            # include all subfolder
            for d in list:
                path = os.path.join(cwd, d)
                if os.path.isfile(os.path.join(path, 'SConscript')):
                    objs = objs + SConscript(os.path.join(d, 'SConscript'))

Return('objs')
3.4 Kconfig.proj
将相关屏幕驱动通过这个脚本加入menuconfig中可配置选中
该脚本在工程对应project目录下
代码配置说明如下
配置参数可参考文档
#APP specific configuration.

config CUSTOM_MEM_MAP
    bool
	select custom_mem_map
	default y

comment "------------Project configuration-----------"

if !BSP_USING_BUILT_LCD

<!-- 屏驱添加 -->
config LCD_USING_ST7796_8080
    bool
    default n

<!-- menuconfig选项 -->
choice
        prompt "Custom LCD driver"
        default LCD_TFT_ST7796_8080										<!-- 默认使用屏驱 -->

        config LCD_TFT_ST7796_8080        							<!--  -->
            bool "4.0 rect DBI Video TFT LCD(480x320)"   <!-- 屏驱说明,选择的时候显示的文字 -->
            select LCD_USING_ST7796_8080                 <!-- 选中的屏驱,要和注册的一样 -->
            select BSP_LCDC_USING_DBI               	 <!-- 屏幕驱动接口类型,前面有说明 -->

    endchoice

<!-- 屏幕分辨率宽 -->
    config LCD_HOR_RES_MAX
        int
	    default 480 if LCD_TFT_ST7796_8080
<!-- 屏幕分辨率高 -->
    config LCD_VER_RES_MAX
        int
        default 320 if LCD_TFT_ST7796_8080
<!-- 屏幕DPI值,数据手册或计算得 -->
    config LCD_DPI
        int
        default 315 if LCD_TFT_ST7796_8080

endif
3.5 menuconfig选择
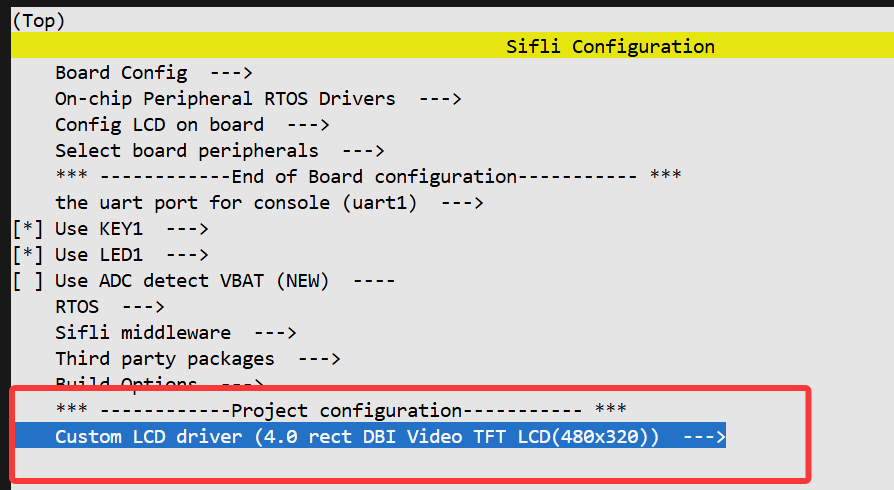
完成Kconfig.proj后即可在menuconfig中选择
menuconfig中多出如下选项
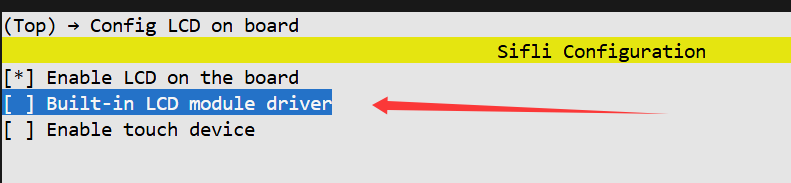
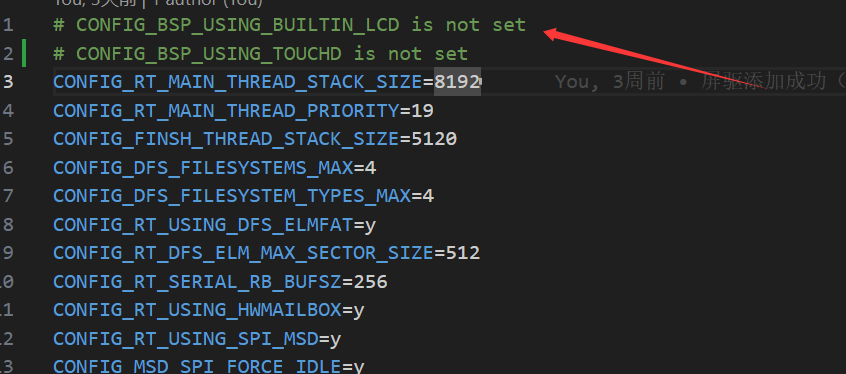
当使用外置屏幕时需要将原有内置屏幕驱动关闭,或在proj.conf中添加# CONFIG_BSP_USING_BUILTIN_LCD is not set
关闭原屏幕驱动
四、内置流程
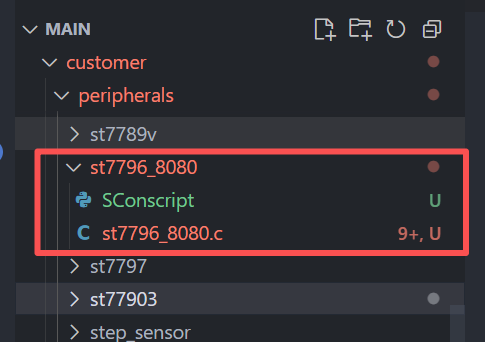
与外置不同,内置屏幕驱动添加在
SDK/customer/peripherals下,这里也包含了各种内置的驱动代码
将通用的屏幕驱动代码加入此文件夹下,然后进行后续配置
4.1 Kconfig配置
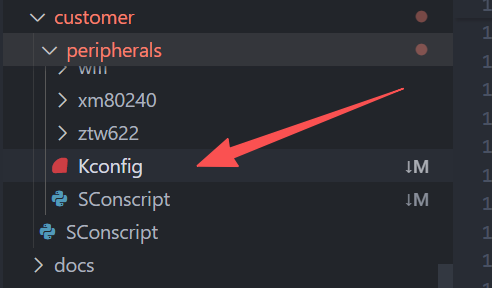
此文件在
SDK/customer/peripherals下
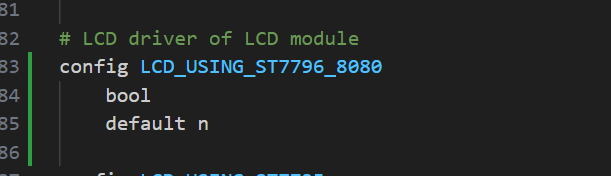
添加驱动声明,这里需要添加屏幕驱动的声明,触摸和背光驱动也在这里添加
需要保证添加的声明与驱动代码中注册的相同
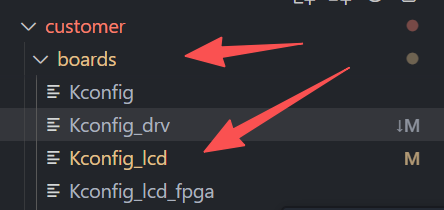
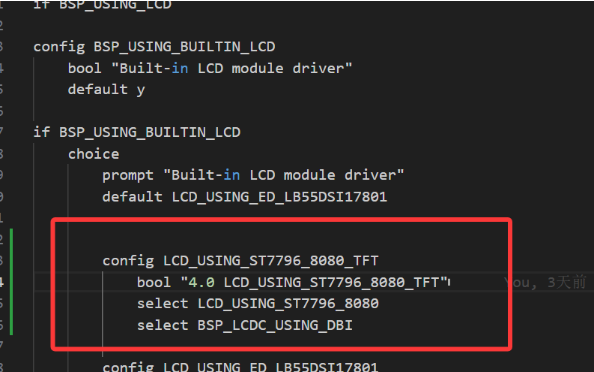
4.2 Kconfig_lcd配置
此文件在
SDK/customer/boards下
这里添加的配置就与外置流程的Kocnfig.proj一样
添加屏幕选项、添加屏幕参数



4.3 menuconfig选择
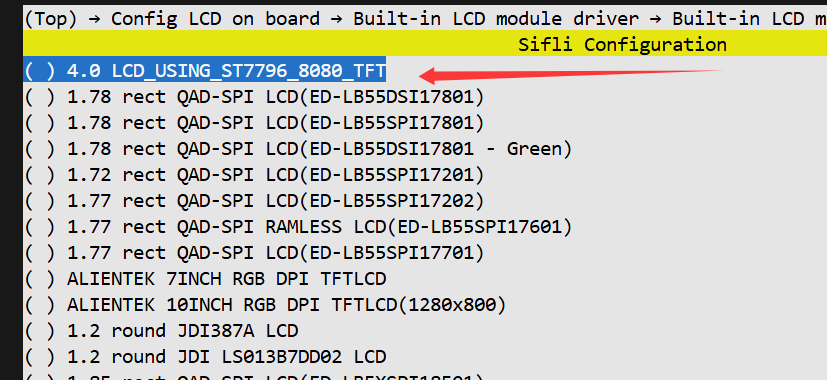
打开menuconfig,在原有LCD屏幕选择中会多出一个我们自己配置的屏幕选项,可以选中,并编译
五、现象
当配置选项完成,且屏幕驱动的编写无误,编译通过下载使用后可以出现如下
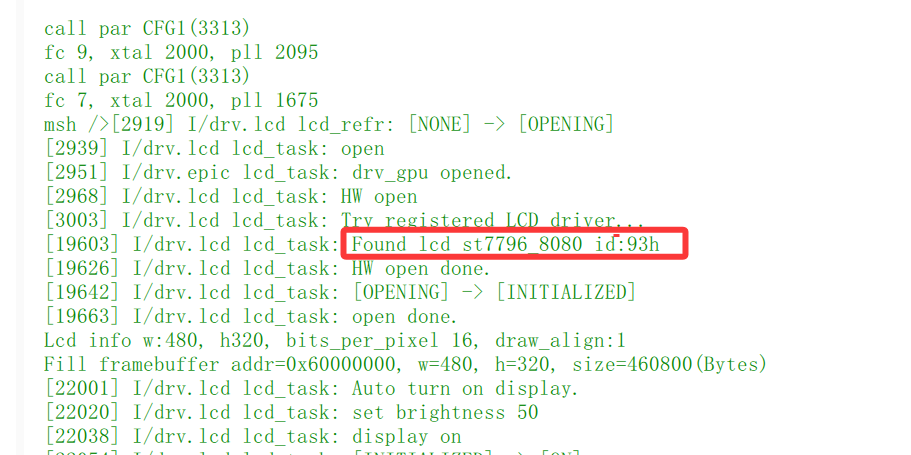
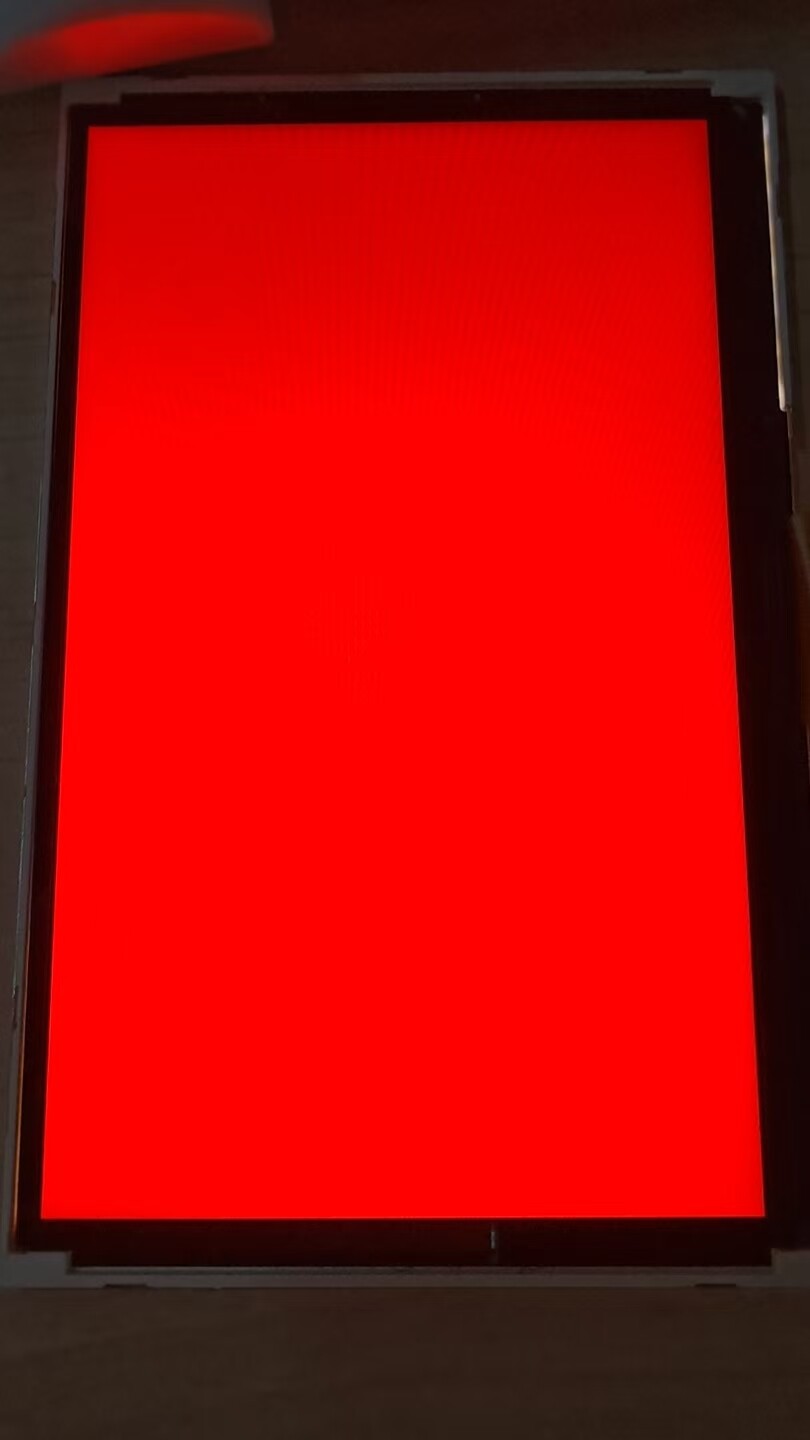
可以读取到屏幕ID,LOG显示正常不会出现读写超时,屏幕正常显示