在VSCode中配置Clangd
本文写于2025年6月1日。
该配置方法非常适用于现有编译器可通过下面命令输出头文件路径的情况。
arm-none-eabi-gcc -xc -v -E null // linux
arm-none-eabi-gcc -xc -v -E NUL  // win
参考文档
- Clangd官网配置说明 Clangd Configuration
- 命令 clangd -h

准备环境
- 安装最新版Clangd。建议从LLVM的Github Release下载,Windows可选择
LLVM-xx.x.x-win64.exe下载,会附带安装最新的Clangd,安装时记得勾选添加环境变量。 - 安装完成后,在重新打开的终端中使用命令
clangd --version检查一下。如果没有下面输出,需要检查一下环境变量是否添加。> clangd --version clangd version 20.1.0 Features: windows Platform: x86_64-pc-windows-msvc
配置Clangd
- 根据Clangd Configuration/File的说明,可配置两个YAML文件(project configuration和user configuration)。
- 分两个文件主要是为了区分不同工程的共享和私有设置。
- 例如提示、补全配置适合所有工程共享。
- 编译器和compile-command目录适合设置工程私有。
- 分两个文件主要是为了区分不同工程的共享和私有设置。
- user configuration
- 根据你的系统,在对应路径下新建
config.yaml文件:- Windows: %LocalAppData%\clangd\config.yaml
- macOS: ~/Library/Preferences/clangd/config.yaml
- Linux and others: $XDG_CONFIG_HOME/clangd/config.yaml
- 写入下面配置,配置作用在Clangd Configuration查询
# https://clangd.llvm.org/config # CompileFlags: # Add: [-Wall] # Remove: # CompilationDatabase: # Compiler: # BuiltinHeaders: Completion: ArgumentLists: Delimiters InlayHints: BlockEnd: true DefaultArguments: true TypeNameLimit: 0 Hover: ShowAKA: true - 根据你的系统,在对应路径下新建
- project configuration
- 在项目或父目录中新建
.clangd文件 - 教一个
小寄巧,工程其实是可以放在SDK文件夹外的,并且SDK可以用git checkout切换版本。所以建议将sf32工程都放在SDK外的同一个文件夹下,这样也只需要在共有的父目录放一个.clangd即可。 - 写入下面配置,注意编译器路径要根据实际的来。
# YAML # https://clangd.llvm.org/config CompileFlags: Add: [] Remove: [] Compiler: C:/Users/用户目录/.sifli/tools/arm-none-eabi-gcc/14.2.1/bin/arm-none-eabi-gcc - 在项目或父目录中新建
配置VSCode工程
-
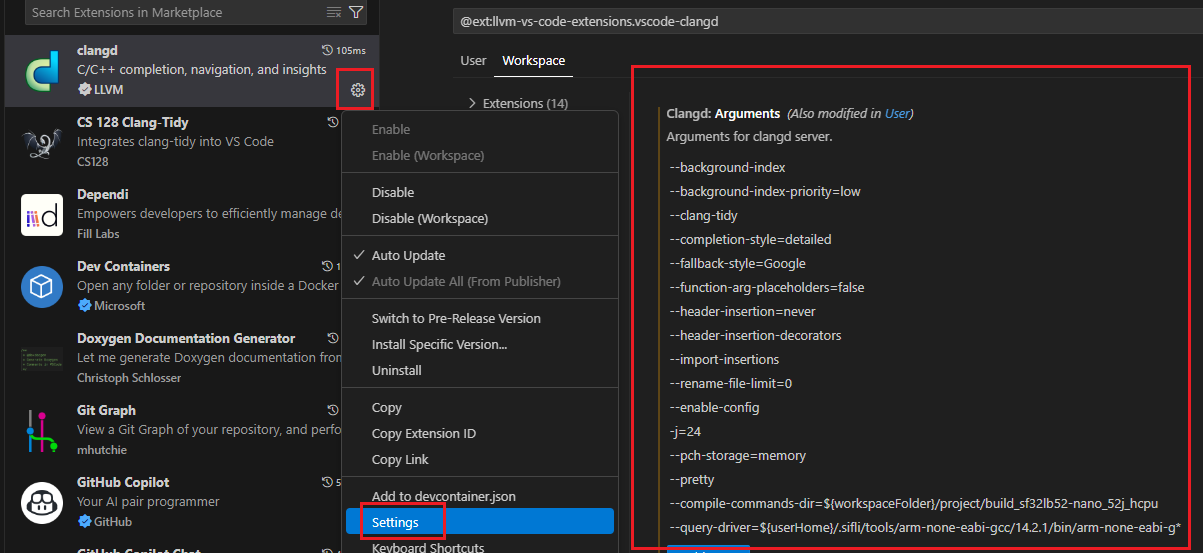
在VSCode中安装LLVM官方插件Clangd
-
打开插件设置,添加下面的配置(或直接添加到settings.json)。
- 如有或未来会有多个C/C++开发环境,强烈建议设置为Workspace Setting,以对工程进行单独配置。
--compile-commands-dir=:compile_commands.json所在路径,需要根据实际的板子编译生成的目录修改。--query-driver=:编译器路径的通配符,我使用官方工具部署的编译器路径。

{
    "clangd.arguments": [
        "--background-index",
        "--background-index-priority=low",
        "--clang-tidy",
        "--completion-style=detailed",
        "--fallback-style=Google",
        "--function-arg-placeholders=false",
        "--header-insertion=never",
        "--header-insertion-decorators",
        "--import-insertions",
        "--rename-file-limit=0",
        "--enable-config",
        "-j=24",
        "--pch-storage=memory",
        "--pretty",
        "--compile-commands-dir=${workspaceFolder}/project/build_sf32lb52-nano_52j_hcpu",
        "--query-driver=${userHome}/.sifli/tools/arm-none-eabi-gcc/14.2.1/bin/arm-none-eabi-g*"
    ],
}
-
重启IDE:
ctrl+shift+p,输入reload window,回车。 -
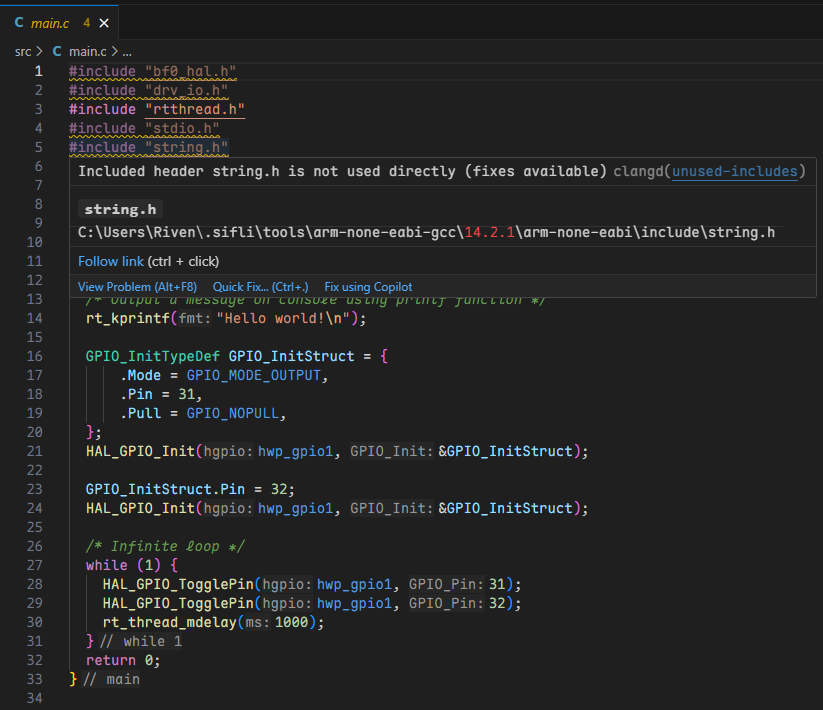
打开
main.c文件,等待一小会,能看到#include "xxx"下面都有横线就是基本成功了。
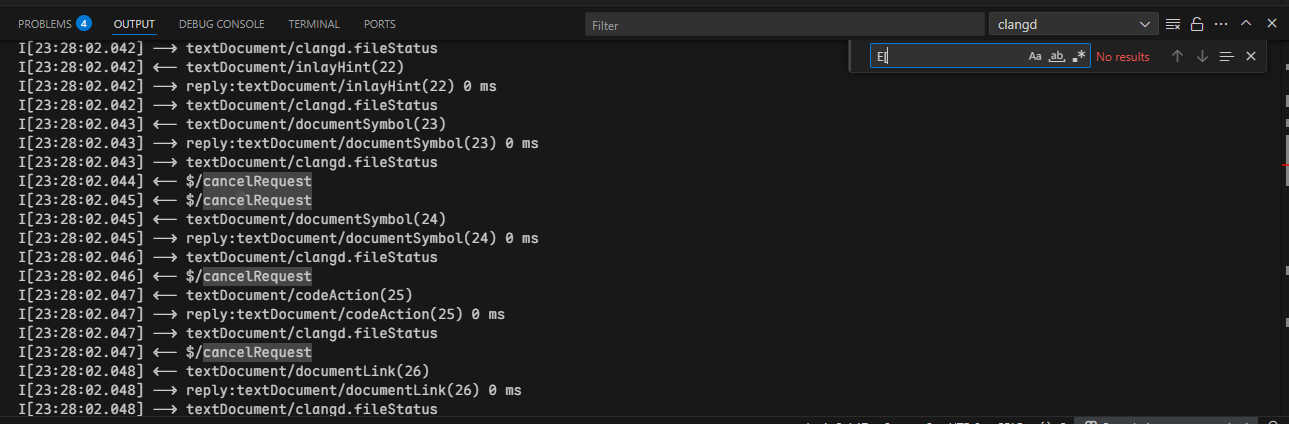
-
ctrl+~查看Output,选择Clangd,检查有没有E[时间戳]的报错,没有的话恭喜你配置成功了。
特别提醒
- Clangd插件配置的是
Workspace,则新项目也需要配置一下。 - 要正确获取到C标准库的头文件路径,需要确保
settings.json中--query-driver通配符要和.clangd中的Compiler:项匹配上,如前文中的一样。